
Introducing the Sample Camping Kitchen Box
by Kurt Huber | Published 11/3/2019
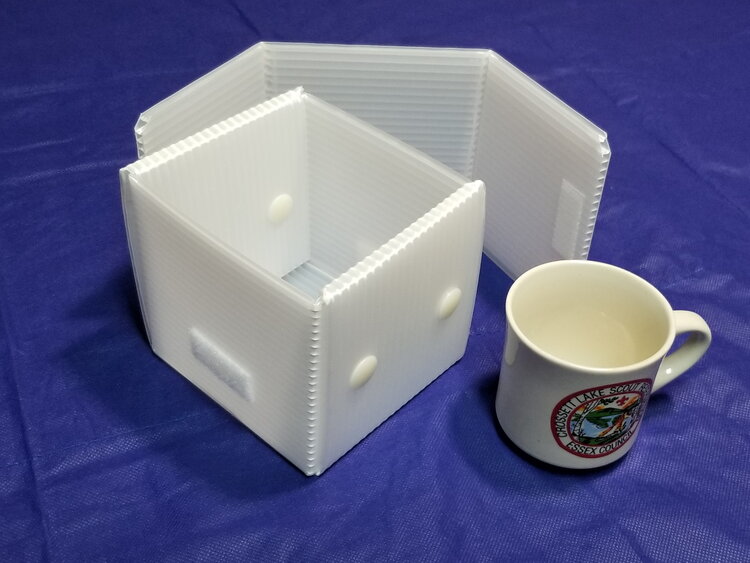
The almost useful sample camping kitchen box
Even for people that are familiar with the concept of a chuck box, I understand that it might be a little hard to wrap your head around a chuck box that is made out of corrugated plastic. Once again the miracle of internet shopping was thwarted by the inability to touch the product, but what could I do?
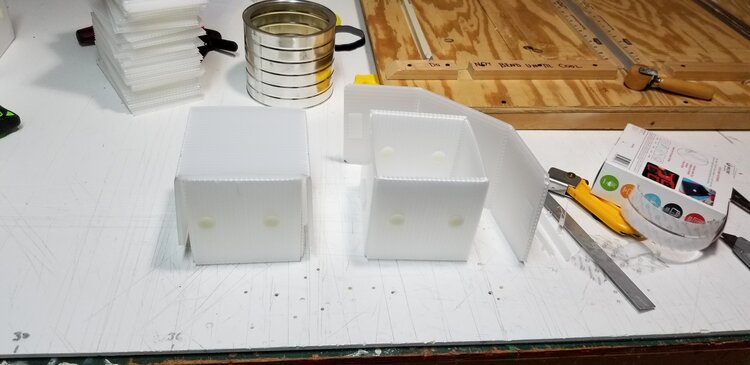
First couple of not totally silly sample Camping Kitchen Boxes
I have been using some of the leftover pieces of 4mm plastic from making the drawers to make bins that are useful for small parts around the shop. It occurred to me that if I could match it with some of the 6mm scraps that I have laying around , I could send it to people who were not ready to make a blind leap for a pretty pricey purchase. After a little trial and error I have created something that covers the essence of the construction and sturdiness of the Camping Kitchen Box, if not actually being a real miniature.
So if you were wondering about the camping kitchen box , but were not ready to plunk down the big bucks, the Sample Camping Kitchen Box is for you. Yes, I am charging 10 dollars, but that really just covers shipping and handling.
View
Beating up the Camping Kitchen Box.
by Kurt Huber | Published 3/3/2019
Some people can’t believe a chuck box made out of plastic can be very tough. I made a video to correct that misconception I dropped the Camping Kitchen Box loaded with gear repeatedly from 10 feet onto concrete. How did it do? Well watch the video.
I can’t wait for some else to repeat this experiment with their wooden or aluminum chuck box!
View
D.I.Y. Pour Over Coffee Maker
by Kurt Huber | Published 8/25/2018
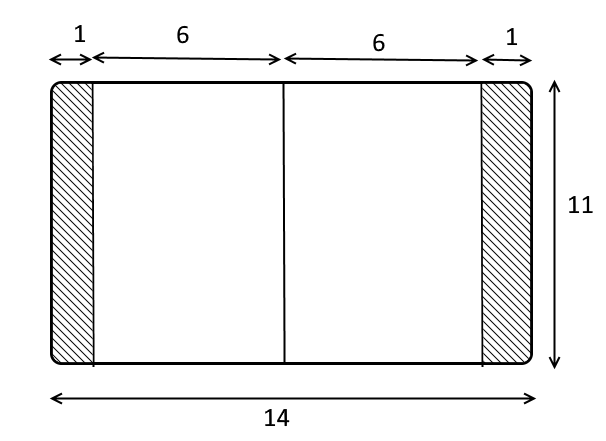
I made a pour over coffee maker out of a plastic cutting sheet and zip ties. It weighs next to nothing and can be folded down, which makes it great for the backpacker (as well as anyone else) who can’t live without freshly brewed coffee in the morning. I purchased both the cutting sheets and the zip ties at a the dollar store, so cost for this project is just 2 bucks! The tools required for this project are very basic , just a ruler, a straight edge, a utility knife or scissors and an awl.
To start cut two pieces from the 14 X 11 cutting sheet that are 6 X 11 as pictured.
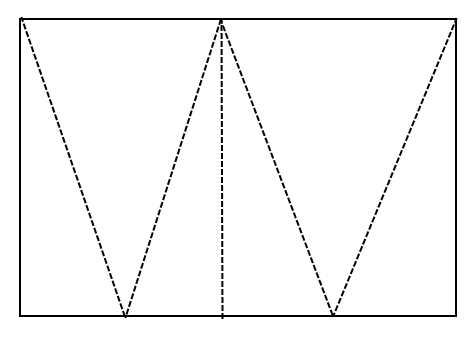
Fold the two pieces as pictured below. First fold the straight line down middle, and then fold the angles which are done in the opposite direction of the first fold.
When both pieces are folded, place them back to back and note the cone that is created. Use the awl to punch the holes for the zip ties that hold the pieces together. For each zip tie, punch two holes about ½ inch apart. Make one hole from one side and one from the other, to make it easier to feed the zip ties through. Put two or three zip ties on each mating surface, close to seam.
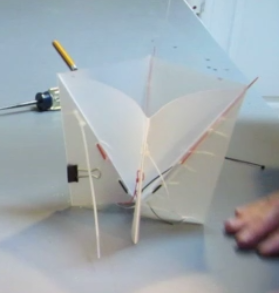
The Two halves held together with zip ties, before the zip ties are trimmed.
Lastly trim the bottom to change the profile so that it forms a slight cone,which will help the device to sit firmly in the cup and makes sure the your coffee drips into your cup and not over the side of your cup
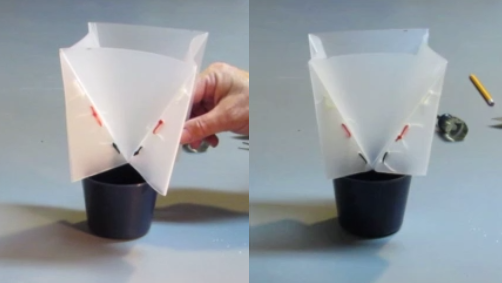
Before and After trimming the bottom
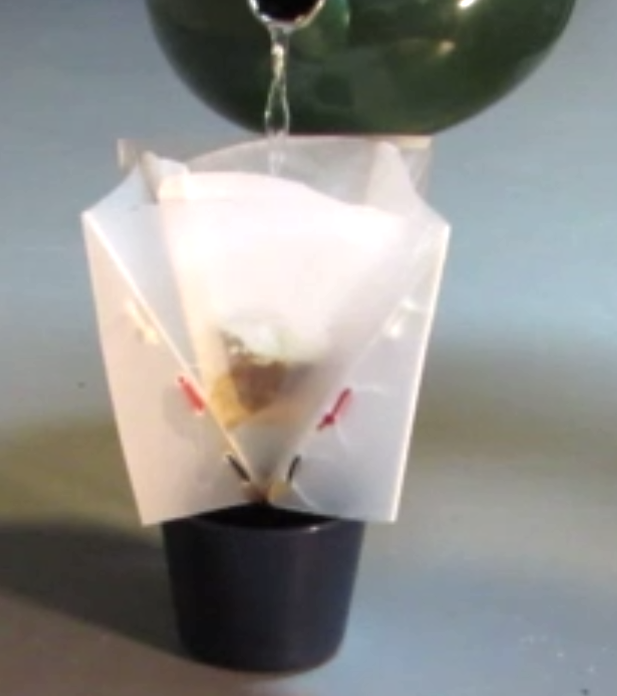
The D.I.Y. pour over coffee maker in use.
View
A Smaller Chuck Box
by Kurt Huber | Published 6/3/2018
IT LOOKS COOL, BUT CAN YOU MAKE IT SMALLER?
One of the more common comments about the Camping Kitchen Box is "It looks cool, but can you make it smaller?" Well after some noodling, some head scratching and some prototypes that went straight into the recycling bin, the answer is "Yes!"
I am proud to present the "Camping kitchen Box 650" the little brother to our classic chuck box, which is now know as the "Camping Kitchen Box 1000".
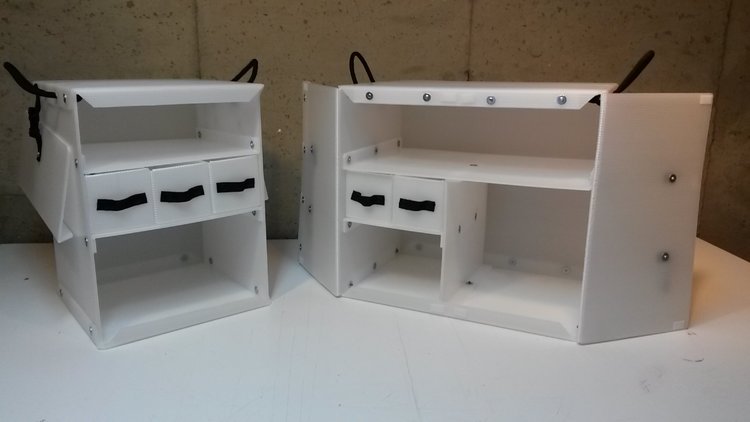
The new Camping Kitchen Box 650 on the left, and our traditional chuck box on the right.
SO WHAT ARE THE DIFFERENCES BETWEEN THE TWO BOXES?
Well first of course is the size. The new box is about 2/3 the size or the original. They are both 22 1/2 inches tall, and both about 16 inches deep, But the new box is only about 17 inches wide (not counting the handles) as compared to the original which is 24 1/2 inches wide (once again not counting the handles). For some folks this is the difference between unwieldy and easy to handle.
Smaller size of course means less weight. The traditional CKB weighted only 10 pounds empty, but the new box weighs an even more incredibly svelte 7 1/2 pounds.
So with the smaller size what are you giving up? Mostly the ability to carry a two burner stove in your chuck box. If you don't count the upper stove compartment both boxes actually have similar storage space.
As you can immediately tell from the pictures the new box has three drawers. When I first started tinkering, it was kind of obvious that a smaller box would have fewer drawers... until of course it became obvious that having the three drawers solved a lot of design issues.
You may have also noticed the doors are different. The original box has folding doors with "living hinges". Unfortunately theses living hinge doors did not scale down. When made shorter, the folding doors just did not fold enough. To solved this problem I had to come up with a new scheme., which turned out to be separate doors that slide in tracks in the front of the box. After you open the box by sliding the doors out, they can be quickly clipped to the side of the box, where they are out of the way but not running loose, trying to get lost.
SO WHICH CAMPING KITCHEN BOX IS FOR ME?
If you want to keep your camp stove together with all your other camp kitchen gear, and don't mind carrying a two foot wide box (or you have some one to help you) the CKB 1000 is for you. If you find the size of the original a bit intimidating, and don't mind making a second trip to get the stove, then the CKB 650 is your solution.
View